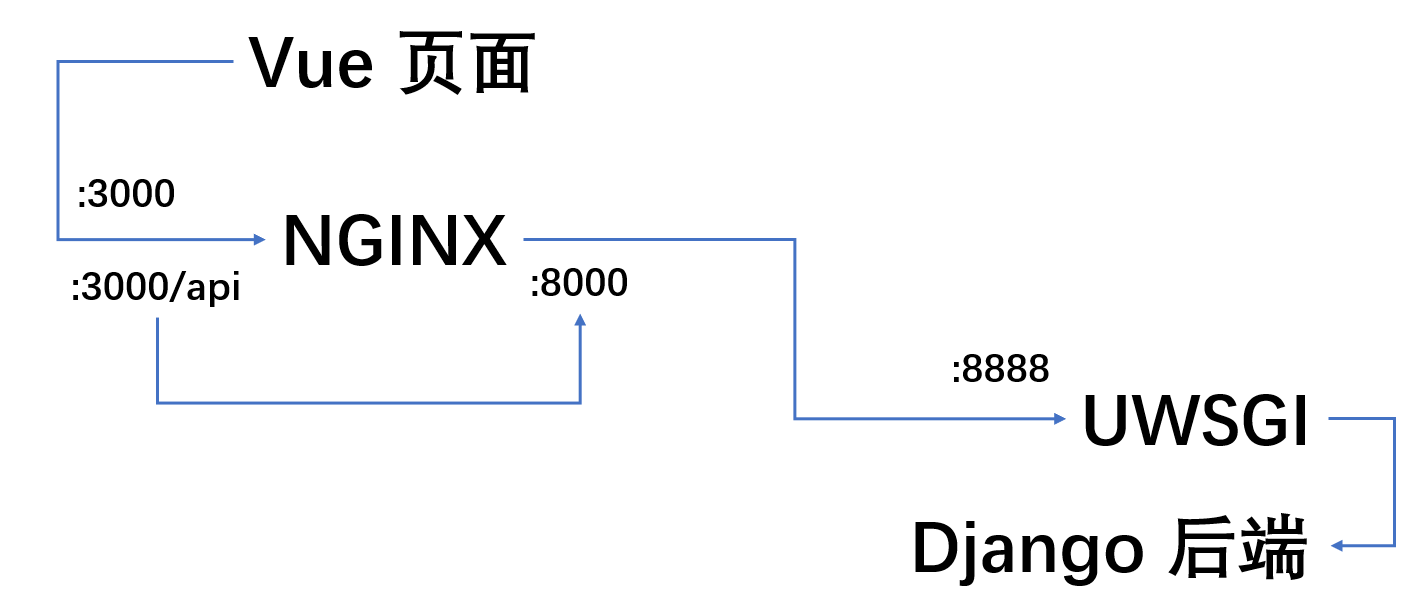
现在流行的 Web 开发模式多为前后端分离开发,即前端使用 Angular、React、Vue 框架开发并打包为静态文件,部署到 Apache、Nginx 服务器,同时对路由做好对应的配置。而后端服务仅提供 RESTful、WebSocket 服务等。
互联网上关于 nginx、uwsgi 的配置文件教程各不相同,有些并不能起作用。笔者通过亲自部署相关的 Web 页面,并在本文中列出对应的配置文件信息。
1. 前提条件
安装好相关的工具,例如:Nginx、Python、Uwsgi 等(Linux 环境下)。
P.S. 本文并不会提供详细的建立网站说明,只是对配置文件进行相关的备份。如需要建立网站,可以参阅文末的参考链接。
2. Nginx 配置文件
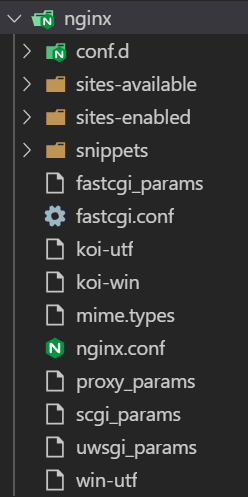
在 /etc/nginx 目录下,结构大致如图:
其中主要配置文件是 nginx.conf,这个文件中包含如下指令:
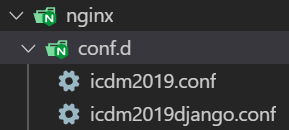
所以,我们只需要在 conf.d 文件夹下新建配置文件,就可以达到自定义配置的目的了:
这里我新建了两个配置文件,一个是对 Vue 打包后的 Web 页面提供服务,另一个是连接 Uwsgi 的后端。
2.1 Web 页面服务
 1server {
 2	listen 3000;
 3	server_name icdm2019;
 4	charset     utf-8;
 5	location / {
 6		root /root/zhangyun/web/icdm-dssc-2019-frontend/dist;  # vue 打包后静态文件存放的地址
 7		index index.html; # 默认主页地址
 8
 9		location /api {
10			proxy_pass http://127.0.0.1:8000; # 代理接口地址
11			include  /etc/nginx/uwsgi_params;
12		}
13	}
14}
这里在 3000 端口提供页面服务,同时对 RESTful API 提供了跨域访问的支持。
2.2 后端服务
 1upstream django {
 2    server 127.0.0.1:8888; # for a web port socket (we'll use this first)
 3}
 4
 5server{
 6    listen 8000;
 7    server_name icdm2019django;
 8    charset utf-8;
 9    client_max_body_size 75M;  #上传文件大小限制
10
11    # 动态文件交给uwsgi处理
12    location /api {
13        uwsgi_pass 127.0.0.1:8888;
14        include /etc/nginx/uwsgi_params;
15    }
16}
在此处,Nginx 在 8000 端口连接到 8888 端口的 uwsgi 服务。
3. uwsgi 配置
 1[uwsgi]
 2home = /home/workspace/judicature-subject2-backend/venv # python 虚拟环境所在目录
 3chdir = /root/zhangyun/web/icdm-dssc-2019-backend/ # 后端 manage.py 所在目录
 4wsgi-file=/root/zhangyun/web/icdm-dssc-2019-backend/icdm2019/wsgi.py # 定位到 wsgi.py
 5module = icdm2019django.wsgi:application
 6master = True
 7processes = 4
 8max-requests = 5000
 9harakiri = 60
10socket = 127.0.0.1:8888
11uid = root
12gid = root
13pidfile = /home/icdm2019uwsgi/master.pid
14daemonize = /home/icdm2019uwsgi/mysite.log
15logto = /home/icdm2019uwsgi/uwsgi.log # log 文件
16vacuum = True
17py-autoreload=1 # 自动重载 Py 文件
这样,uwsgi 在 8888 端口提供服务。
4. 常用指令
 1# 检查 nginx 配置文件是够有错误
 2nginx -t
 3
 4# 重启nginx
 5service nginx restart
 6# 或者
 7nginx -s stop
 8nginx -c /etc/nginx/nginx.conf
 9
10# 查看uwsgi进程
11ps -aux | grep uwsgi
12
13# 正常关闭uwsgi进程
14uwsgi --stop /home/mysite_uwsgi/master.pid
15
16# 强制关闭全部uwsgi进程
17ps -aux | grep uwsgi |awk '{print $2}'|xargs kill -9
5. 参考链接
版权声明:本文遵循 CC BY-SA 4.0 版权协议,转载请附上原文出处链接和本声明。
Copyright statement: This article follows the CC BY-SA 4.0 copyright agreement. For reprinting, please attach the original source link and this statement.


